https://stackoverflow.com/questions/7912576/console-log-showing-contents-of-array-object
console.log( object );
or
console.log(‘object: %O’, object);
or console.trace(‘tracing from here’);
textpattern blog for Marks Notes
htpasswd CRYPT
.htpasswd
md5-hash for WP
WP password
AddyScramble
Captcha
ICOmaker
iptools
google-apps
typetester
CoolText
compare url registrys
dell bios
checkip.org
tizag
docx conversion
Down For Everybody?
flash parms
gmail 1and1 mx settings
google suggest site
google-gmail free
http header test
J-Script Obfuscator
Marv Stalcup Maps
pc hardware
Php obfusgator
TextBook
Textpattern
Txp Resources
website scanner
![]()
Mar 4, 02:29 AM
https://stackoverflow.com/questions/7912576/console-log-showing-contents-of-array-object
console.log( object );
or
console.log(‘object: %O’, object);
or console.trace(‘tracing from here’);
Oct 2, 12:10 AM
first, get php working by following this github script
sudo echo ‘‘ >/var/www/html/index.php ; ###create a php info page
install Composer:
sudo curl -sS https://getcomposer.org/installer | php ;
sudo mv ./composer.phar /usr/local/bin/composer ;
sudo chmod +x —verbose /usr/local/bin/composer ;
/usr/local/bin/composer -V ;
su —command ‘/usr/local/bin/composer -V’ mark
su —command ‘/usr/local/bin/composer require league/oauth2-facebook’ mark ;
su —command ‘/usr/local/bin/composer require league/oauth2-github’ mark ;
su —command ‘/usr/local/bin/composer require league/oauth2-google’ mark ;
su —command ‘/usr/local/bin/composer require stevenmaguire/oauth2-microsoft’ mark ;
##su —command ‘/usr/local/bin/composer require hayageek/oauth2-yahoo’ mark ;
Sep 21, 09:15 PM
FEATHERS LOGOUT:
(async () => { try { let result = await feathersApp.logout(); console.log(‘the result is: ‘ + result) } catch (e) { console.log(e); } } ) () ;
PROXY SOLUTION: — 2020-04-02
https://stackoverflow.com/questions/60498087/issues-running-socket-io-over-an-apache-proxy
feathers-facebook using localhost works fine when running locally, but when running through a proxy, problems arise.
to get it working:
in ./config/default.json:
1) change “host” to the actual domain name. example:
“host” : “featherstest.website”,
2) add the “defaults” tag and include “protocol” and “host” under the “oauth” section:
"oauth": {
"defaults" : {
"protocol" : "https",
"host" : "featherstest.website"
},
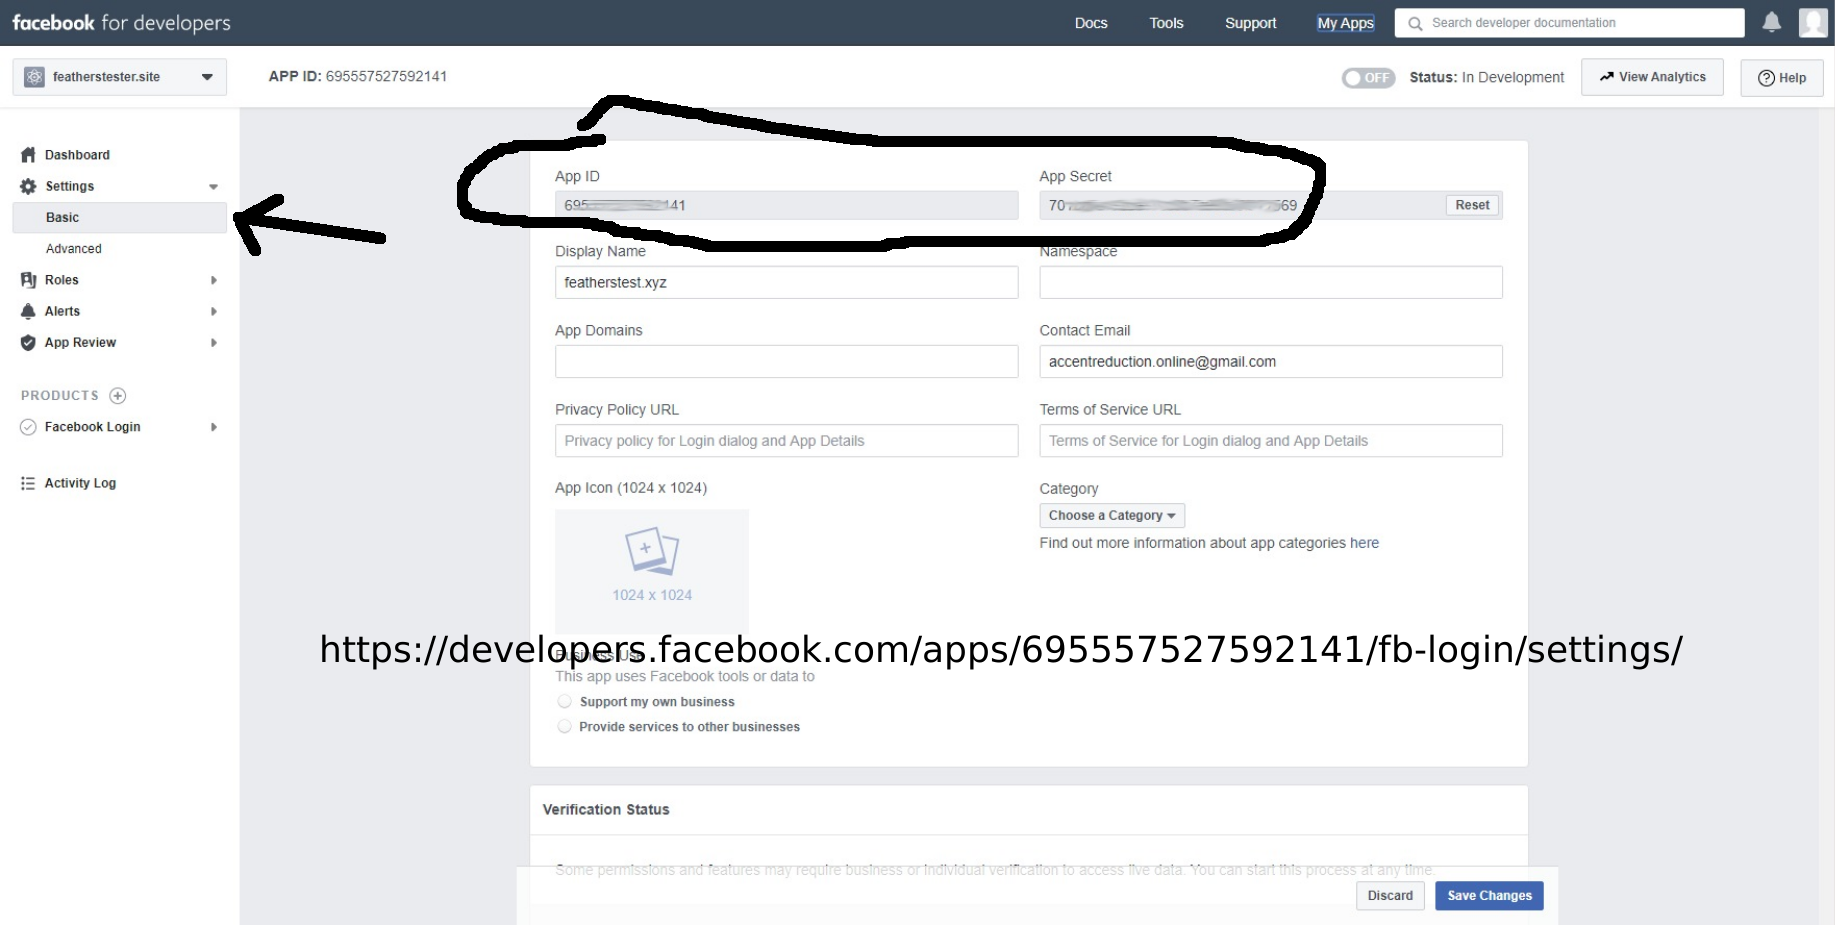
"facebook": {
"key": "2XXXXXXXXXXXXX1",
"secret": "0XXXXXXXXXXXXXXXXXXXXXXXX4"
}
}
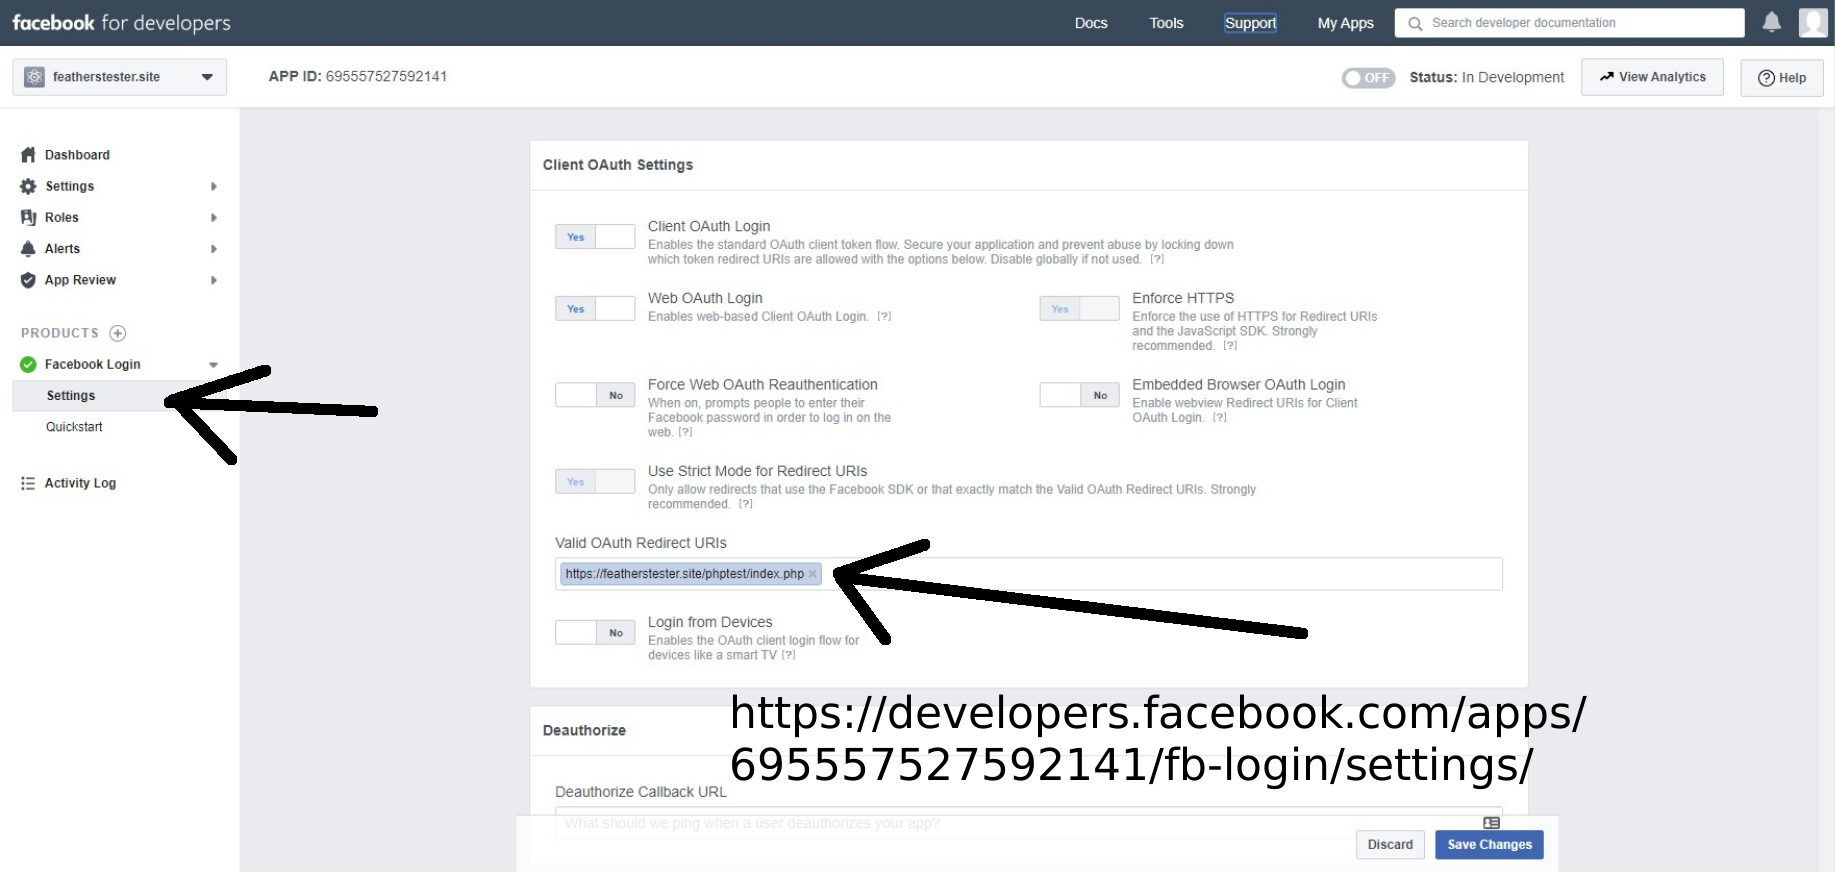
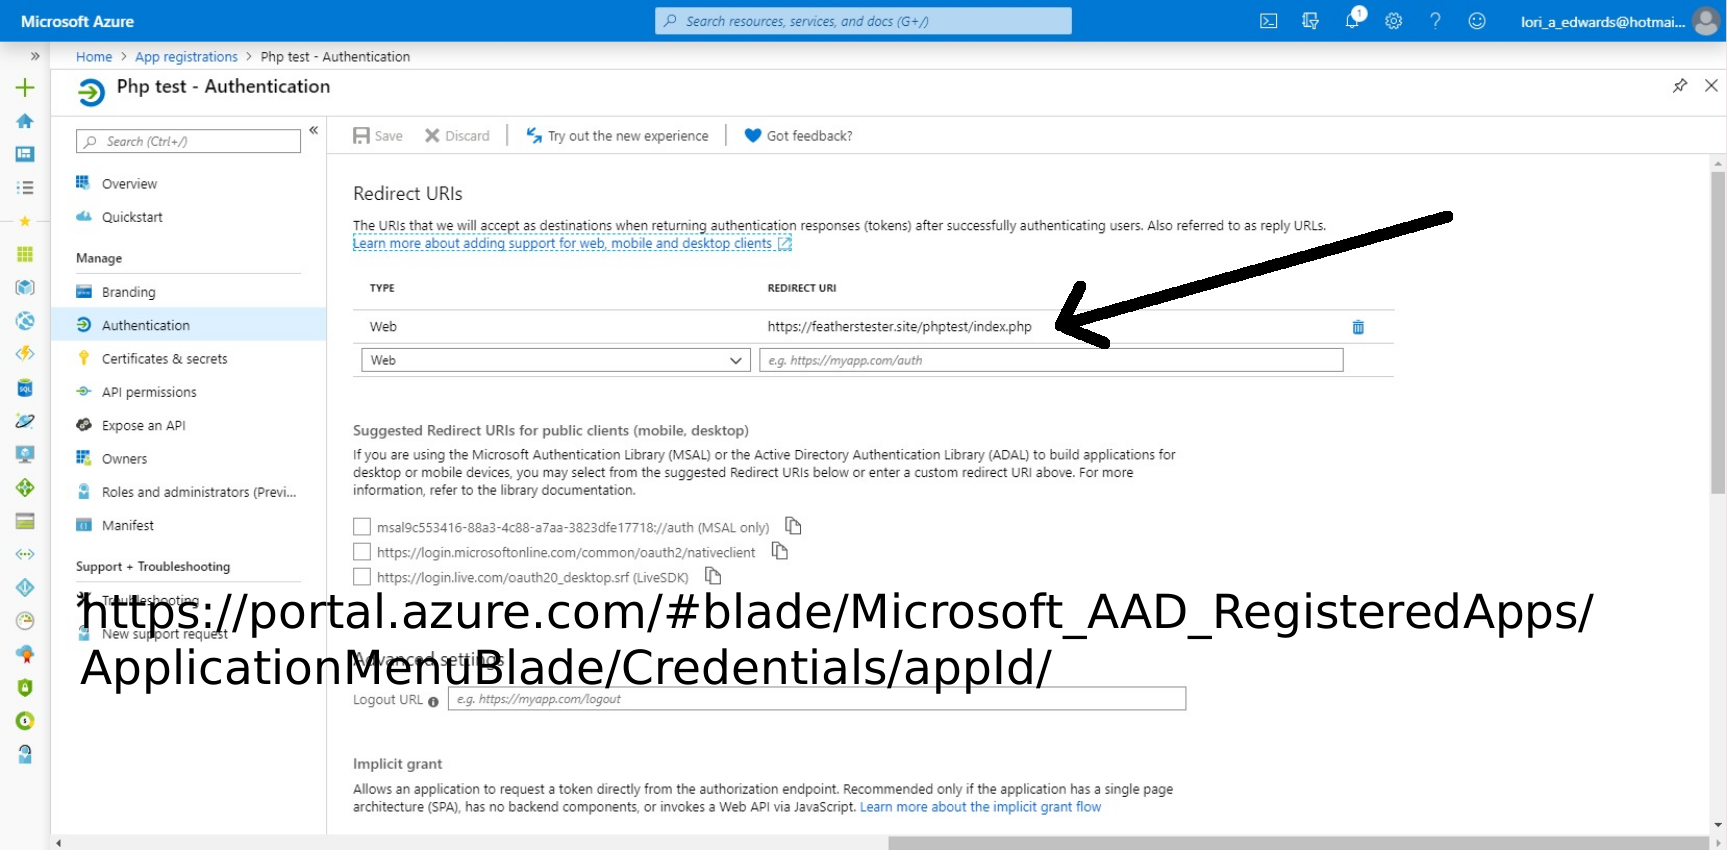
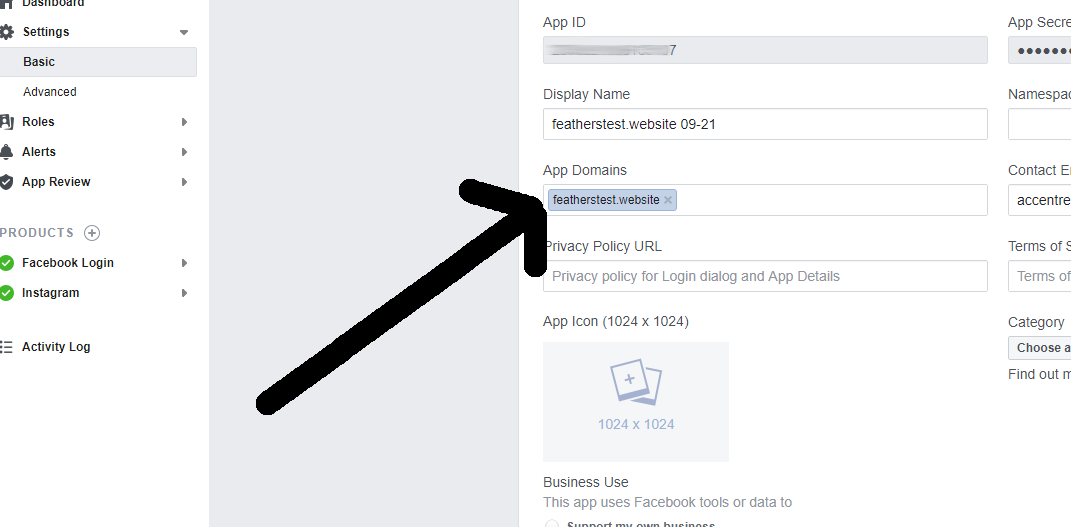
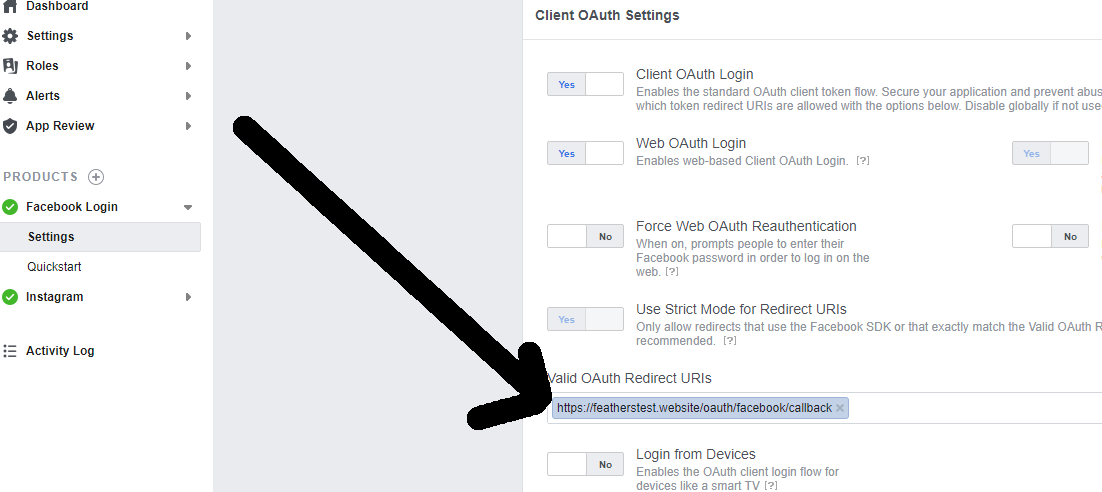
3) make sure facebook has the correct domain name and callback for facebook:
4) to get extra fields such as “email”:
https://docs.feathersjs.com/cookbook/authentication/facebook.html#getting-profile-data
in ./src/authentication.js:
const { AuthenticationService, JWTStrategy } = require(‘@feathersjs/authentication’);
const { LocalStrategy } = require(‘@feathersjs/authentication-local’);
const { expressOauth, OAuthStrategy } = require(‘@feathersjs/authentication-oauth’);

//      added all below:

const axios = require(‘axios’);

class FacebookStrategy extends OAuthStrategy {
  async getProfile (authResult) {
    // This is the oAuth access token that can be used
    // for Facebook API requests as the Bearer token
    const accessToken = authResult.access_token;

    const { data } = await axios.get(‘https://graph.facebook.com/me’, {
      headers: {
        authorization: `Bearer ${accessToken}`
      },
      params: {
        // There are
        fields: ‘id,name,email’
      }
    });

    return data;
  }

  async getEntityData(profile) {
    // `profile` is the data returned by getProfile
    const baseData = await super.getEntityData(profile);

    return {
      …baseData,
      email: profile.email
    };
  }
}
// end of added


module.exports = app => {
  const authentication = new AuthenticationService(app);

  authentication.register(‘jwt’, new JWTStrategy());
  authentication.register(‘facebook’, new FacebookStrategy());  // added!

  app.use(‘/authentication’, authentication);
  app.configure(expressOauth());
};
COMPLETE EXAMPLE FOR FACEBOOK AND GOOGLE:
./config/default.json:
{
“host”: “featherstest.website”,
“port”: 3030,
“public”: “../public/”,
“paginate”: {
“default”: 10,
“max”: 50
},
“authentication”: {
“entity”: “user”,
“service”: “users”,
“secret”: “i/E4LXXXXXXXFxffc=”,
“authStrategies”: [
“jwt”,
“local”
],
“jwtOptions”: {
“header”: {
“typ”: “access”
},
“audience”: “https://yourdomain.com”,
“issuer”: “feathers”,
“algorithm”: “HS256”,
“expiresIn”: “1d”
},
“local”: {
“usernameField”: “email”,
“passwordField”: “password”
},
“oauth”: {
“redirect” : “/”,
“defaults” : {
“protocol” : “https”,
“host” : “featherstest.website”
},
“facebook”: {
“key”: “2XXXXXXXXXXXXXXXXXXXX107”,
“secret”: “dfXXXXXXXXXXXXXXcebdbd”,
“scope”: [“public_profile, email”]
},
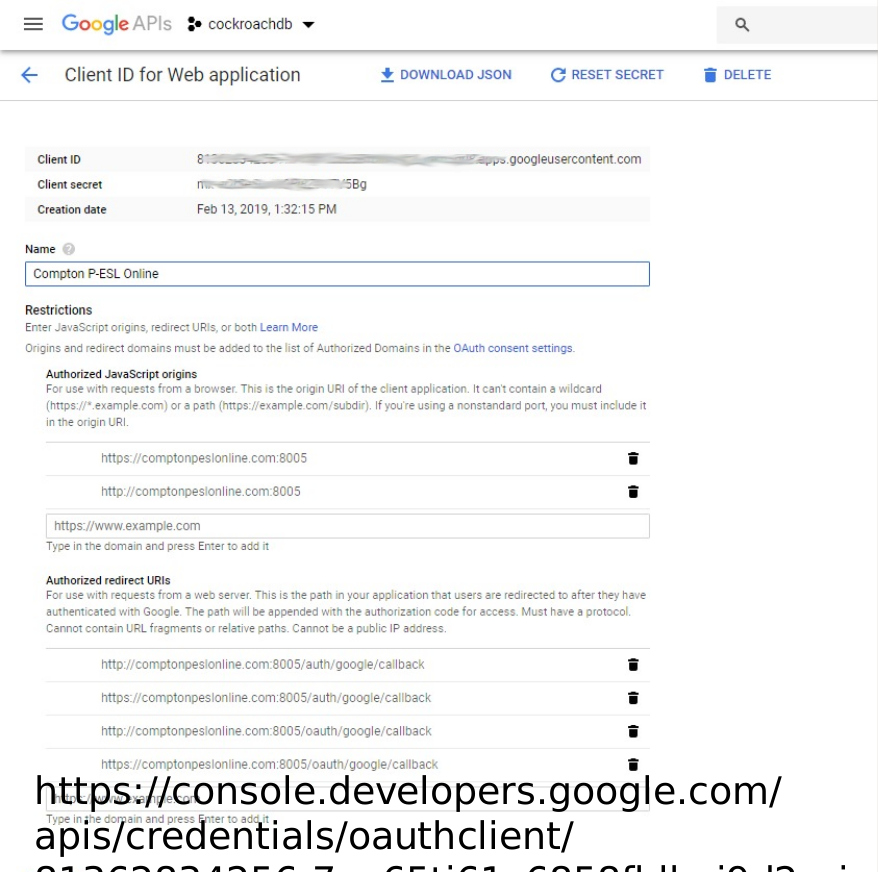
“google”: {
“key”: “813XXXXXXXXXXXXXXXXXX4di.apps.googleusercontent.com”,
“secret”: “XXXXXXXXXXXXXXXXXXXXXMi”,
“scope”: [
“email”,
“profile”,
“openid”
]
}
}
},
“nedb”: “../data”
}
./src/authentication.js
const { AuthenticationService, JWTStrategy } = require(‘@feathersjs/authentication’);
const { LocalStrategy } = require(‘@feathersjs/authentication-local’);
const { expressOauth, OAuthStrategy } = require(‘@feathersjs/authentication-oauth’);
const axios = require(‘axios’);
class FacebookStrategy extends OAuthStrategy { async getProfile (authResult) {
const accessToken = authResult.access_token; const { data } = await axios.get(‘https://graph.facebook.com/me’, { headers: { authorization: `Bearer ${accessToken}` }, params: { fields: ‘id,name,email,picture’ } }); return data; } async getEntityData(profile) { const baseData = await super.getEntityData(profile); return { …baseData, name: profile.name, email: profile.email }; } }class GoogleStrategy extends OAuthStrategy { async getEntityData(profile) {
const baseData = await super.getEntityData(profile); return { …baseData, profilePicture: profile.picture, email: profile.email }; } }module.exports = app => { const authentication = new AuthenticationService(app);
authentication.register(‘jwt’, new JWTStrategy()); authentication.register(‘local’, new LocalStrategy()); authentication.register(‘facebook’, new FacebookStrategy()); authentication.register(‘google’, new GoogleStrategy()); app.use(‘/authentication’, authentication); app.configure(expressOauth()); };./public/index.html (partial)
…………..